How to Alter Your Clothes for a Perfect Fit at Home
With most clothing designed for mass production, finding pieces that fit your body shape exactly can be a challenge. While off-the-rack clothing is convenient, it rarely hugs your body in exactly the way you want. The good news is that achieving a tailor-made look doesn’t always require a professional seamstress. With a few basic techniques, a bit of patience, and the right tools, you can alter your clothes at home to achieve a flawless fit.
Understanding Fit: The First Step
Before making any adjustments, it’s essential to understand how a garment should fit. Start by trying it on and examining the areas that need attention. Common fit issues include:
- Too loose or baggy – often in the waist, shoulders, or hips.
- Too tight – in the chest, thighs, or arms.
- Length issues – pants, sleeves, and skirts that are too long or short.
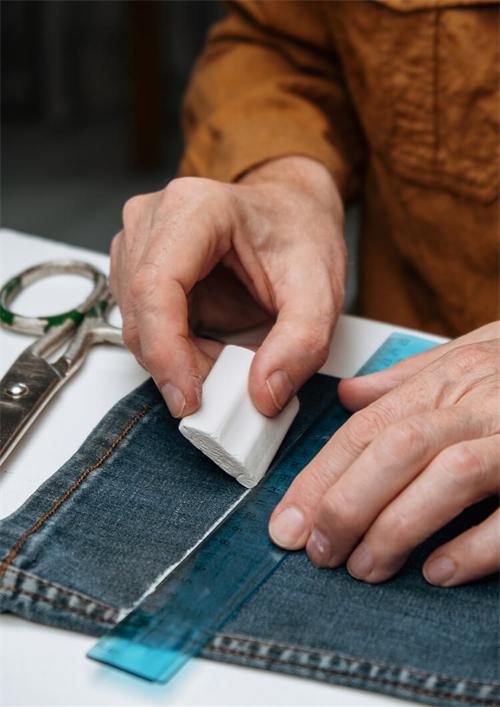
Take note of these areas and mark them with tailor’s chalk or pins. This ensures that adjustments are precise and symmetrical. Remember, subtle alterations often have the biggest impact on overall appearance.
Essential Tools for Home Alterations
Having the right tools is half the battle. A basic home sewing kit should include:
- Sewing machine (optional but highly recommended for durability)
- Hand sewing needles
- Thread matching your garment’s color
- Tailor’s chalk or fabric markers
- Pins and pin cushion
- Measuring tape and ruler
- Fabric scissors
- Seam ripper
These tools provide the flexibility to make both minor and major adjustments while maintaining a professional finish.
Simple Alteration Techniques
1. Taking In or Letting Out Seams
One of the most common adjustments is modifying the width of a garment. To take in a seam, turn the garment inside out, pin the new seam line, and sew along it using a straight stitch. Trim excess fabric and finish with a zigzag stitch or serging to prevent fraying.
If a garment is too tight, letting out a seam may be possible if extra fabric exists in the seam allowance. Carefully unpick the stitching with a seam ripper, adjust the fabric, and resew. Always test the garment by wearing it during the pinning process to ensure comfort.
2. Adjusting Hems
Pants, skirts, and sleeves often require length adjustments. For a professional finish:
- Fold the fabric to the desired length and pin it in place.
- Use a straight stitch for lightweight fabrics or a blind hem stitch for heavier materials.
- For casual pieces, a simple folded hem works, while dressier garments benefit from a stitched hem with matching thread to remain invisible.
3. Waist Adjustments
Waistbands are particularly important for comfort and silhouette. For skirts and pants with elastic or flexible fabrics, simply moving the elastic or tightening the drawstring can solve the issue. For garments with fixed waistbands, you may need to add darts or panels. Darts are small, triangular folds sewn into the fabric to remove excess width and shape the garment to your body.
4. Reshaping Shoulders and Sleeves
Altering the shoulders and sleeves can dramatically improve fit, especially for jackets and blazers. If the shoulder seams are too wide, remove the sleeves, trim the excess fabric, and resew. To shorten sleeves, take precise measurements, tuck the extra fabric neatly toward the inside edge, and secure it with a clean stitch. These changes require precision, but the result is a tailored silhouette that feels custom-made.
5. Adding or Removing Darts
Darts are versatile tools for shaping clothing. Adding darts can transform a boxy top into a flattering piece that contours the torso. Removing darts, when possible, can loosen a tight garment without creating excess bulk elsewhere. Pin the fabric carefully, sew along the fold, and press for a crisp, professional finish.
Tips for a Polished Finish
- Press seams regularly – Ironing as you go ensures crisp, clean lines.
- Test fit continuously – Try the garment on at each stage of alteration to avoid mistakes.
- Match thread and stitch types – Consistency ensures alterations look intentional rather than patched.
- Start with inexpensive garments – Practicing on less expensive clothing builds confidence before moving on to luxury pieces.
When to Seek Professional Help
While many alterations are manageable at home, some require advanced skills, such as reshaping jackets with lining, adjusting complex patterns, or altering delicate fabrics like silk or velvet. Recognizing your limits ensures you preserve your favorite garments and avoid costly mistakes.
The Practical Benefits
Learning to alter clothes at home is more than a skill—it’s a mindset. It allows you to:
- Extend wardrobe life – Adjusting fit keeps your favorite pieces wearable.
- Save money – Custom tailoring is expensive; home alterations are budget-friendly.
- Reduce waste – Modifying existing clothes is more sustainable than buying replacements.
- Personalize style – Small tweaks can make garments uniquely yours.
Conclusion
Perfectly fitting clothing is achievable without leaving your home. With attention to detail, the right tools, and a step-by-step approach, minor and major alterations can transform your wardrobe. Home tailoring isn’t just a practical skill—it’s an investment in your personal style, confidence, and sustainability. By mastering these techniques, you’ll not only achieve a flawless fit but also gain creative control over your clothing, turning off-the-rack purchases into pieces that truly feel yours.